Quantcast
Channel: QGIS Planet
Viewing all 1090 articles
Browse latest View live

ItOpen: QGIS development

$
0
0

We started our GIS development activities back in 2001, focusing on free open-source software, we developed and deployed several WebGis websites using GRASS and UNM MapServer plus PHP MapScript.

After a while, we stared our Python migration by using the GeoDjango Framework and a choice of Javascript mapping libraries for the client, in particular, we developed WebGIS front-ends with OpenLayers and GeoEXT.

QGIS python plugins development

For internal usage we developed two popular QGIS plugins:

both plugins are released with GPL license and are available on the official QGIS Python Plugins repository, source code is available on my GitHub account.

Official QGIS Python Plugins Repository

Back in 2010 we started contributing to the QGIS community by starting the implementation of the new official QGIS Python Plugins repository.

The new repository was developed in Python using the Django framework

We are still maintaining the plugins repository and we actively participate at all QGIS HackFests to share ideas and coordinate the development with the rest of the QGIS team.

QGIS Server and QGIS Web Client

For a medium sized public administration we recently developed a complete WebGIS system for cadastrial and planning data. We choose the amazing QGIS Server as mapping engine and QGIS Web Client for the client side.

During the development of the system we contributed to the code of both components by providing patches and bug fixes and by developing a full stack of PHP support services that are now integrated in the core of QGIS Web Client


ItOpen: QGIS server python plugins tutorial

$
0
0

This is the second article about python plugins for QGIS server, see also the introductory article posted a few days ago.

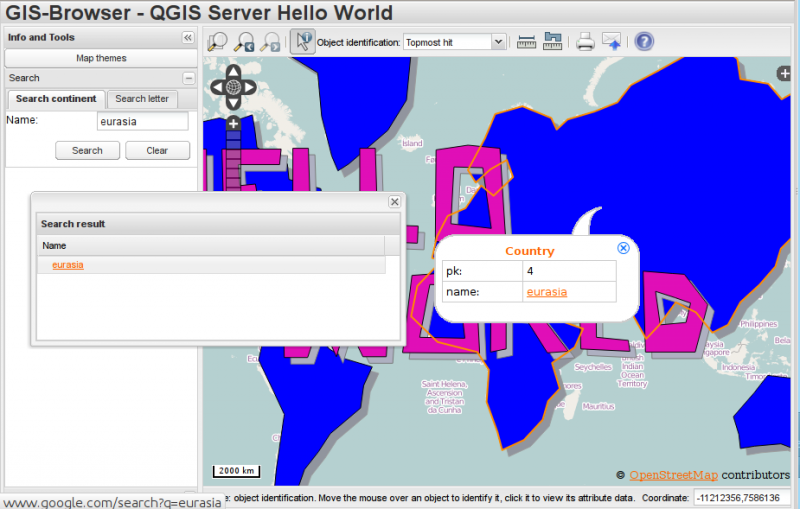
In this post I will introduce the helloServer example plugin that shows some common implementation patterns exploiting the new QGIS Server Python Bindings API.

Server plugins and desktop interfaces

Server plugins can optionally have a desktop interface exactly like all standard QGIS plugins.

A typical use case for a server plugin that also has a desktop interface is to allow the users to configure the server-side of the plugin from QGIS desktop, this is the same principle of configuring WMS/WFS services of QGIS server from the project properties.

The only important difference it that while the WMS/WFS services configuration is stored in the project file itself, the plugins can store and access project data but not to the user’s settings (because the server process normally runs with a different user). For this reason, if you want to share configuration settings between the server and the desktop, provided that you normally run the server with a different user, paths and permissions have to be carefully configured to grant both users access to the shared data.


Server configuration

This is an example configuration for Apache, it covers both FCGI and CGI:

  ServerAdmin webmaster@localhost
  # Add an entry to your /etc/hosts file for xxx localhost e.g.
  # 127.0.0.1 xxx
  ServerName xxx
    # Longer timeout for WPS... default = 40
    FcgidIOTimeout 120 
    FcgidInitialEnv LC_ALL "en_US.UTF-8"
    FcgidInitialEnv PYTHONIOENCODING UTF-8
    FcgidInitialEnv LANG "en_US.UTF-8"
    FcgidInitialEnv QGIS_DEBUG 1
    FcgidInitialEnv QGIS_CUSTOM_CONFIG_PATH "/home/xxx/.qgis2/"
    FcgidInitialEnv QGIS_SERVER_LOG_FILE /tmp/qgis.log
    FcgidInitialEnv QGIS_SERVER_LOG_LEVEL 0
    FcgidInitialEnv QGIS_OPTIONS_PATH "/home/xxx/public_html/cgi-bin/"
    FcgidInitialEnv QGIS_PLUGINPATH "/home/xxx/.qgis2/python/plugins"
    FcgidInitialEnv LD_LIBRARY_PATH "/home/xxx/apps/lib"

    # For simple CGI: ignored by fcgid
    SetEnv QGIS_DEBUG 1
    SetEnv QGIS_CUSTOM_CONFIG_PATH "/home/xxx/.qgis2/"
    SetEnv QGIS_SERVER_LOG_FILE /tmp/qgis.log 
    SetEnv QGIS_SERVER_LOG_LEVEL 0
    SetEnv QGIS_OPTIONS_PATH "/home/xxx/public_html/cgi-bin/"
    SetEnv QGIS_PLUGINPATH "/home/xxx/.qgis2/python/plugins"
    SetEnv LD_LIBRARY_PATH "/home/xxx/apps/lib"

    RewriteEngine On
    
        RewriteCond %{HTTP:Authorization} .
        RewriteRule .* - [E=HTTP_AUTHORIZATION:%{HTTP:Authorization}]
    

  ScriptAlias /cgi-bin/ /home/xxx/apps/bin/
  <Directory "/home/xxx/apps/bin/">
    AllowOverride All
    Options +ExecCGI -MultiViews +FollowSymLinks
    Require all granted  

  ErrorLog ${APACHE_LOG_DIR}/xxx-error.log
  CustomLog ${APACHE_LOG_DIR}/xxx-access.log combined


In this particular example, I’m using a QGIS server built from sources and installed in /home/xxx/apps/bin the libraries are in /home/xxx/apps/lib and LD_LIBRARY_PATH poins to this location.
QGIS_CUSTOM_CONFIG_PATH tells the server where to search for QGIS configuration (for example qgis.db).
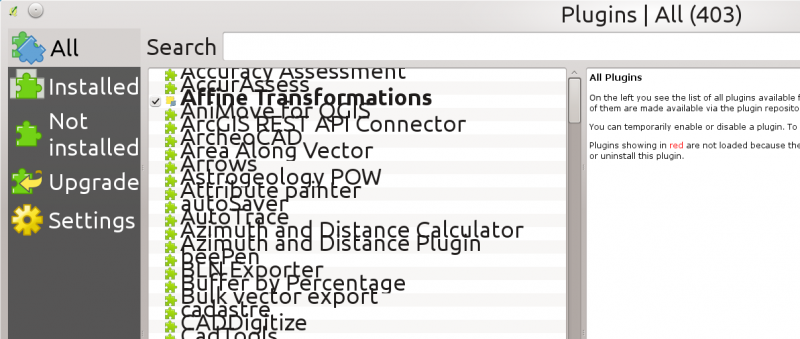
QGIS_PLUGINPATH is searched for plugins as start, your server plugins must sit in this directory, while developing you can choose to use the same directory of your QGIS desktop installation.
QGIS_DEBUG set to 1 to enable debug and logging.

Anatomy of a server plugin

For a plugin to be seen as a server plugin, it must provide correct metadata informations and a factory method:

Plugin metadata

A server enabled plugins must advertise itself as a server plugin by adding the line

server=True

in its metadata.txt file.

The serverClassFactory method

A server enabled plugins is basically just a standard QGIS Python plugins that provides a serverClassFactory(serverIface) function in its __init__.py. This function is invoked once when the server starts to generate the plugin instance (it’s called on each request if running in CGI mode: not recommended) and returns a plugin instance:

def serverClassFactory(serverIface):
    from HelloServer import HelloServerServer
    return HelloServerServer(serverIface)

You’ll notice that this is the same pattern we have in “traditional” QGIS plugins.

Server Filters

A server plugin typically consists in one or more callbacks packed into objects called QgsServerFilter.

Each QgsServerFilter implements one or all of the following callbacks:

The following example implements a minimal filter which prints HelloServer! in case the SERVICE parameter equals to “HELLO”.

from qgis.server import *
from qgis.core import *

class HelloFilter(QgsServerFilter):

    def __init__(self, serverIface):
        super(HelloFilter, self).__init__(serverIface)    

    def responseComplete(self):        
        request = self.serverInterface().requestHandler()
        params = request.parameterMap()
        if params.get('SERVICE', '').upper() == 'HELLO':
            request.clearHeaders()
            request.setHeader('Content-type', 'text/plain')
            request.clearBody()
            request.appendBody('HelloServer!')

The filters must be registered into the serverIface as in the following example:

class HelloServerServer:
    def __init__(self, serverIface):
        # Save reference to the QGIS server interface
        self.serverIface = serverIface
        serverIface.registerFilter( HelloFilter, 100 )          

The second parameter of registerFilter allows to set a priority which defines the order for the callbacks with the same name (the lower priority is invoked first).

Full control over the flow

By using the three callbacks, plugins can manipulate the input and/or the output of the server in many different ways. In every moment, the plugin instance has access to the QgsRequestHandler through the QgsServerInterface, the QgsRequestHandler has plenty of methods that can be used to alter the input parameters before entering the core processing of the server (by using requestReady) or after the request has been processed by the core services (by using sendResponse).

The following examples cover some common use cases:

Modifying the input

The example plugin contains a test example that changes input parameters coming from the query string, in this example a new parameter is injected into the (already parsed) parameterMap, this parameter is then visible by core services (WMS etc.), at the end of core services processing we check that the parameter is still there.

from qgis.server import *
from qgis.core import *

class ParamsFilter(QgsServerFilter):

    def __init__(self, serverIface):
        super(ParamsFilter, self).__init__(serverIface)

    def requestReady(self):
        request = self.serverInterface().requestHandler()
        params = request.parameterMap( )
        request.setParameter('TEST_NEW_PARAM', 'ParamsFilter')

    def responseComplete(self):
        request = self.serverInterface().requestHandler()
        params = request.parameterMap( )
        if params.get('TEST_NEW_PARAM') == 'ParamsFilter':
            QgsMessageLog.logMessage("SUCCESS - ParamsFilter.responseComplete", 'plugin', QgsMessageLog.INFO)
        else:
            QgsMessageLog.logMessage("FAIL    - ParamsFilter.responseComplete", 'plugin', QgsMessageLog.CRITICAL)

This is an extract of what you see in the log file:

src/core/qgsmessagelog.cpp: 45: (logMessage) [0ms] 2014-12-12T12:39:29 plugin[0] HelloServerServer - loading filter ParamsFilter
src/core/qgsmessagelog.cpp: 45: (logMessage) [1ms] 2014-12-12T12:39:29 Server[0] Server plugin HelloServer loaded!
src/core/qgsmessagelog.cpp: 45: (logMessage) [0ms] 2014-12-12T12:39:29 Server[0] Server python plugins loaded
src/mapserver/qgsgetrequesthandler.cpp: 35: (parseInput) [0ms] query string is: SERVICE=HELLO&request=GetOutput
src/mapserver/qgshttprequesthandler.cpp: 547: (requestStringToParameterMap) [1ms] inserting pair SERVICE // HELLO into the parameter map
src/mapserver/qgshttprequesthandler.cpp: 547: (requestStringToParameterMap) [0ms] inserting pair REQUEST // GetOutput into the parameter map
src/mapserver/qgsserverfilter.cpp: 42: (requestReady) [0ms] QgsServerFilter plugin default requestReady called
src/core/qgsmessagelog.cpp: 45: (logMessage) [0ms] 2014-12-12T12:39:29 plugin[0] HelloFilter.requestReady
src/mapserver/qgis_map_serv.cpp: 235: (configPath) [0ms] Using default configuration file path: /home/xxx/apps/bin/admin.sld
src/mapserver/qgshttprequesthandler.cpp: 49: (setHttpResponse) [0ms] Checking byte array is ok to set...
src/mapserver/qgshttprequesthandler.cpp: 59: (setHttpResponse) [0ms] Byte array looks good, setting response...
src/core/qgsmessagelog.cpp: 45: (logMessage) [0ms] 2014-12-12T12:39:29 plugin[0] HelloFilter.responseComplete
src/core/qgsmessagelog.cpp: 45: (logMessage) [0ms] 2014-12-12T12:39:29 plugin[0] SUCCESS - ParamsFilter.responseComplete
src/core/qgsmessagelog.cpp: 45: (logMessage) [0ms] 2014-12-12T12:39:29 plugin[0] RemoteConsoleFilter.responseComplete
src/mapserver/qgshttprequesthandler.cpp: 158: (sendResponse) [0ms] Sending HTTP response
src/core/qgsmessagelog.cpp: 45: (logMessage) [0ms] 2014-12-12T12:39:29 plugin[0] HelloFilter.sendResponse

On line 13 the “SUCCESS” string indicates that the plugin passed the test.

The same technique can be exploited to use a custom service instead of a core one: you could for example skip a WFS SERVICE request or any other core request just by changing the SERVICE parameter to something different and the core service will be skipped, then you can inject your custom results into the output and send them to the client (this is explained here below).

Changing or replacing the output

The watermark filter example shows how to replace the WMS output with a new image obtained by adding a watermark image on the top of the WMS image generated by the WMS core service:

import os

from qgis.server import *
from qgis.core import *
from PyQt4.QtCore import *
from PyQt4.QtGui import *


class WatermarkFilter(QgsServerFilter):

    def __init__(self, serverIface):
        super(WatermarkFilter, self).__init__(serverIface)

    def responseComplete(self):
        request = self.serverInterface().requestHandler()
        params = request.parameterMap( )
        # Do some checks
        if (request.parameter('SERVICE').upper() == 'WMS' \
                and request.parameter('REQUEST').upper() == 'GETMAP' \
                and not request.exceptionRaised() ):
            QgsMessageLog.logMessage("WatermarkFilter.responseComplete: image ready %s" % request.infoFormat(), 'plugin', QgsMessageLog.INFO)
            # Get the image
            img = QImage()
            img.loadFromData(request.body())
            # Adds the watermark
            watermark = QImage(os.path.join(os.path.dirname(__file__), 'media/watermark.png'))
            p = QPainter(img)
            p.drawImage(QRect( 20, 20, 40, 40), watermark)
            p.end()
            ba = QByteArray()
            buffer = QBuffer(ba)
            buffer.open(QIODevice.WriteOnly)
            img.save(buffer, "PNG")
            # Set the body
            request.clearBody()
            request.appendBody(ba)

In this example the SERVICE parameter value is checked and if the incoming request is a WMSGETMAP and no exceptions have been set by a previously executed plugin or by the core service (WMS in this case), the WMS generated image is retrieved from the output buffer and the watermark image is added. The final step is to clear the output buffer and replace it with the newly generated image. Please note that in a real-world situation we should also check for the requested image type instead of returning PNG in any case.

The power of python

The examples above are just meant to explain how to interact with QGIS server python bindings but server plugins have full access to all QGIS python bindings and to thousands of python libraries, what you can do with python server plugins is just limited by your imagination!


See all QGIS Server related posts

ItOpen: QGIS Server Python Plugins Ubuntu Setup

$
0
0

Prerequisites

I assume that you are working on a fresh install with Apache and FCGI module installed with:

$ sudo apt-get install apache2 libapache2-mod-fcgid
$ # Enable FCGI daemon apache module
$ sudo a2enmod fcgid

Package installation

First step is to add debian gis repository, add the following repository:

$ cat /etc/apt/sources.list.d/debian-gis.list
deb http://qgis.org/debian trusty main
deb-src http://qgis.org/debian trusty main

$ # Add keys
$ sudo gpg --recv-key DD45F6C3
$ sudo gpg --export --armor DD45F6C3 | sudo apt-key add -

$ # Update package list
$ sudo apt-get update && sudo apt-get upgrade

Now install qgis server:

$ sudo apt-get install qgis-server python-qgis

Install the HelloWorld example plugin

This is an example plugin and should not be used in production!
Create a directory to hold server plugins, you can choose whatever path you want, it will be specified in the virtual host configuration and passed on to the server through an environment variable:

$ sudo mkdir -p /opt/qgis-server/plugins
$ cd /opt/qgis-server/plugins
$ sudo wget https://github.com/elpaso/qgis-helloserver/archive/master.zip
$ # In case unzip was not installed before:
$ sudo apt-get install unzip
$ sudo unzip master.zip 
$ sudo mv qgis-helloserver-master HelloServer

Apache virtual host configuration

We are installing the server in a separate virtual host listening on port 81.
Rewrite module can be optionally enabled to pass HTTP BASIC auth headers (only needed by the HelloServer example plugin).

$ sudo a2enmod rewrite

Let Apache listen to port 81:

$ cat /etc/apache2/conf-available/qgis-server-port.conf
Listen 81
$ sudo a2enconf qgis-server-port

The virtual host configuration, stored in /etc/apache2/sites-available/001-qgis-server.conf:

<VirtualHost *:81>
    ServerAdmin webmaster@localhost
    DocumentRoot /var/www/html

    ErrorLog ${APACHE_LOG_DIR}/qgis-server-error.log
    CustomLog ${APACHE_LOG_DIR}/qgis-server-access.log combined

    # Longer timeout for WPS... default = 40
    FcgidIOTimeout 120 
    FcgidInitialEnv LC_ALL "en_US.UTF-8"
    FcgidInitialEnv PYTHONIOENCODING UTF-8
    FcgidInitialEnv LANG "en_US.UTF-8"
    FcgidInitialEnv QGIS_DEBUG 1
    FcgidInitialEnv QGIS_SERVER_LOG_FILE /tmp/qgis-000.log
    FcgidInitialEnv QGIS_SERVER_LOG_LEVEL 0
    FcgidInitialEnv QGIS_PLUGINPATH "/opt/qgis-server/plugins"

    # ABP: needed for QGIS HelloServer plugin HTTP BASIC auth
    <IfModule mod_fcgid.c>
        RewriteEngine on
        RewriteCond %{HTTP:Authorization} .
        RewriteRule .* - [E=HTTP_AUTHORIZATION:%{HTTP:Authorization}]
    </IfModule>

    ScriptAlias /cgi-bin/ /usr/lib/cgi-bin/
    <Directory "/usr/lib/cgi-bin">
        AllowOverride All
        Options +ExecCGI -MultiViews +FollowSymLinks
        Require all granted
        #Allow from all
  </Directory>
</VirtualHost>

Enable the virtual host and restart Apache:

$ sudo a2ensite 001-qgis-server
$ sudo service apache2 restart

Test:

$ wget -q -O - "http://localhost:81/cgi-bin/qgis_mapserv.fcgi?SERVICE=HELLO"
HelloServer!

See all QGIS Server related posts

ItOpen: QGIS Web Client GetFeatureInfo formatters

$
0
0

The transformation of a value to an URL address is done automatically in a few cases (this feature is currently undocumented): for example when the column value starts with http or https or a string contained in mediaurl parameter defined in Globaloptions.js.
But if you want more, then you need a real formatting function that given the value (and maybe some more information bits about where the values comes from) returns a properly formatted hyperlink or whatever else you need.

This new feature is currently available in my customformatters branch, and an example formatter is provided in Globaloptions.js and implemented for the helloworld.qgs sample project.

Here is how it works:

// Custom WMS GetFeatureInfo results formatters: you can define custom
// filter functions to apply custom formatting to values coming from
// GetFeatureInfo requests when the user use the "identify" tool.
// The same formatting functions can be normally also used as "renderer"
// function passed to column configuration in the "gridColumns" property
// of the grid configuration of the WMS GetFeatureInfo search panels.

// Example formatter, takes the value, the column name and the layer name,
// normally only the first parameter is used.
function customURLFormatter(attValue, attName, layerName){
    return '<a href="http://www.google.com/search?q=' + encodeURI(attValue) + '" target="_blank">' + attValue + '</a>';
}

// Formatters configuration
var getFeatureInfoCustomFormatters = {
    'Country': { // Layer name
        'name': customURLFormatter // Can be an array if you need multiple formatters
    }
};

If you also want to apply the same formatting to result grids coming from the search panels, you can use the very same functions passing the function in the renderer attribute of the datagrid, as shown around line 18 in the following snippet:

var simpleWmsSearch = {
  title: "Search continent",
  query: 'simpleWmsSearch',
  useWmsRequest: true,
  queryLayer: "Country",
  formItems: [
    {
      xtype: 'textfield',
      name: 'name',
      fieldLabel: "Name",
      allowBlank: false,
      blankText: "Please enter a name (e.g. 'africa')",
      filterOp: "="
    }
  ],
  gridColumns: [
    // Apply the formatter as the "renderer"
    {header: 'Name', dataIndex: 'name', menuDisabled: 'true', renderer: customURLFormatter}
  ],
//  highlightFeature: true,
//  highlightLabel: 'name',
  selectionLayer: 'Country',
  selectionZoom: 0,
  doZoomToExtent: true
};

The result of the formatter applied to both views is in the following picture:

Qgis Web Client Formatters

ItOpen: QGIS and QT: getting ready for HiDPI screens

$
0
0


A few months ago I changed my laptop for a Dell M3800 with an amazing 3840×2160 15,6″ display, that means a crazy 282 dpi resolution. I won’t discuss the problems I had to face and resolve to make this thing usable with Kubuntu 14.04 because they are yet some useful resource on the net: https://wiki.archlinux.org/index.php/HiDPI. The executive summary is that KDE and QT/GTK applications work pretty well and without serious usability problems: Firefox, Chrome, Thunderbird have no problems at all if we exclude some really minor glitches like pixelated or too big icons in a few occasions (see the example below).

Small problem with a big icon in Firefox

Small problem with a big icon in Firefox @ 282 dpi


QGIS on HiDPI

Unfortunately, QGIS has some serious usability problems on such an high resolution screen and I spent a few hours try to understand how is it possible to fix them and what should be done to avoid them in the first place.

The reason behind is that HiDPI screens usage is increasing and we can expect they’ll gain more and more market share expecially among professional users and GIS users are mostly professional users!

To give you a quick taste of the kind of problems that have to be addressed, take a look at the pictures below.

QGIS statusbar: unreadable on HiDPI

QGIS statusbar: unreadable on HiDPI

qgis-hidpi-pluginmanager

Plugin manager rows are too low and left tab column has a 200 px max width

qgis-hidpi-attributetable-issue

Attribute table rows are too low and icons are too small


I tried to fix some of the issues shown above and this is the resulting commit: https://github.com/qgis/QGIS/pull/2014/commits, QGIS run on different platforms and I wasn’t able to test it on all of them, I hope the fixes will not cause problems on platforms and screen sizes other than I could test myself.

But the purpose of this notes it to list some humble tips that could be useful to avoid or fix these kind of problem.

Tip #1: Avoid hardcoded pixel values!

Web developers started the fight with HiDPI screens a few years ago, (buzz)words like responsive design and the move towards mobile platforms forced the developers to consider what a pixel really is in a web context, and the obvious conclusion was that a pixel is not a pixel! Please see the following resources if you’re curious and not familiar with these concepts:

The most obvious and efficient solution for the web browser was to change the concept of pixel from a physical to a logical unit.

Unfortunately, at least in QT the pixel is still a physical pixel, this means the we must avoid to specify the size of GUI elements in pixel units.


Qt documentation has a page about Developing Scalable UIs.

This blog page also has some useful tips: HighDPI in KDE Applications.


A collection of useful tips for QT developers can be found in the HiDPI KDE wiki page:

  • Do not use QFont setPixelSize but use setPointSize, and better, avoid setting a custom size at all.
  • Try to stick with the possibilities from KGlobalSettings (KGlobalSettings::generalFont(), KGlobalSettings::largeFont() etc.)
  • Do not use a fixed QSize with images (QPixmap, QIcon…)
  • Do not use KIconLoader::StdSizes. Even though it would sound like a good idea to use it, it suffers from the same issue: Hardcoded pixel sizes.
  • To get a user’s configured icon size, include and use the IconSize function (note: this is not a member function): IconSize(KIconLoader::Small). However, be aware that the user might be able to mess up your apps look by setting some insane values here.
  • If you use svg images for icons (for example in plasma) get the standard sizes from some theme elements (e.g. buttons, fonts) and scale your images accordingly. (Don’t do this when using pixel based images)

Some of the tips above are clearly related to KDE, but I’ve found them still useful to get the overall picture.

Coming to QGIS specific problems, there are still many that have to be resolved, but the overall application is somewhat already useable. The issues I have addressed were easy picks and most of the times it was enough to remove the hardcoded values and rely to QT default sizing mechanisms to get a good result, such as in this case (from src/app/qgisapp.cpp):

//mCoordsLabel->setMaximumHeight( 20 );

Things were harder with plugin manager, the MVC delegate that draws the plugins rows contained a lot of hardcoded metrics for icon and text placement, the solution was to change the values to be relative to the configured font height, see all details in my PR to solve plugin manager HiDPI issues


This is generally a good idea: we must not make any assumption about the size of the fonts the user will be using.

Tip #2: force resize of dialogs

This is something that you should be aware of if you are using an HiDPI screen to build your GUI.

I first encountered this problem when developing my IPyConsole QGIS python plugin: I designed the GUI with designer-qt4 on my HiDPI screen and forget about testing it on “normal” screens, the result is that the window size of the settings dialog (a relatively small dialog) was set by designer at a crazy value of 1115×710. It was impossible from QT Designer to set a small size by dragging the window corner with the mouse: the application automatically reset the dialog size to the calculated minimum size (which on an HiDPI screen was that huge  1115×710).

The solution in that case was to manually alter the Ui_SettingsDialog.ui file to set a small size (say 300×200) and call adjustSize()

self.settingsDlg.show()
# This will adjust the size according to font/dpi:
self.settingsDlg.adjustSize()
result = self.settingsDlg.exec_()

Tip #3: Icons

I haven’t yet come to a solution for the right size for icons (suggestions welcome!). Of course the first point is to move all icons to SVG, the process has already started but many icons have still to be converted.

But having scalable icons is not enough: we must make sure that the icon size is not hardcoded in the GUI, there are some settings for icon size in QGIS options dialog and that might be the right point to start but we probably need more than one size:

  • size of toolbar icons
  • size of plugin icons
  • size for smaller toolbars (attribute table, python console vertical sidebar to cite a few)

Maybe a 3-sizes approach would be fine (big, medium, small), for an easy configuration, some pre-defined values for HiDPI / 96dpi and HD screens would be useful.

To get an idea of what the attribute table looks like right now on an HiDPI screen, look at the picture below, scaled to 96dpi:


qgis-hidpi-attributetable-small-icons-issue96dpi

Icons are too small on an HiDPI screen


Conclusions

There is still much work to do in order to have an usable interface on HiDPI screens, some issues can be easily solved by avoiding hardcoded sizes and leaving to QT the heavy job of calculating GUI widget sizes.

It’s important that developers (not only core developers but plugin developers too) are aware of this kind of issues and how to avoid them in the first place.

HiDPI screens are just around the corner and it’s better to be prepared.


A final note about QT5, it’s not clear to me if and when the move to QT5 will be done and moreover if that move will automatically solve HiDPI issues due to a better HiDPI support, but I’m afraid it won’t.


ItOpen: QGIS server python plugins

$
0
0


Today it’s a great day for QGIS Server: Python plugins, the project that took me busy during the past two months, has been merged to master and will be available starting with the next QGIS release.

The project has been discussed and approved in Essen during the last QGIS HF (see my presentation about server plugins), thanks to the input and suggestions coming from Marco Hugentobler and Martin Dobias it is now implemented in the more complete and flexible way.

In this article I will introduce the core concepts and the main features of python plugins for QGIS server.

QGIS server plugins architecture

QGIS server provides some core services: WFS, WMS, WCS. What we wanted to achieve was a system to easily add new services and modify existing services through python plugins.

Mi first experiments were limited to a 404 handler that intercepts unhandled requests and hooks into python plugins capturing every stdout output, this was indeed not enough flexible for a full fledged plugins implementation.

The main loop

QGIS server is not different from most web services implementations: it listens for incoming requests, parses the URL query string parameters and returns its output accordingly to the incoming request.

The standard loop before introducing python plugins looked like the following:

  • Get the request
    • create GET/POST/SOAP request handler
    • if SERVICE is WMS/WFS/WCS
      • create WMS/WFS/WCS server passing in request handler
        • call server’s executeRequest()
          • call request handler output method
    • else Exception

Plugins come into play

Server python plugins are loaded once when the FCGI application starts and they should register one or more QgsServerFilter (from this point, you might find useful a quick look to the server plugins API docs). Each filter should implement at least one of three callbacks (aka: hooks):

    1. requestReady
    2. sendResponse
    3. responseComplete

All filters have access to the request/response object (QgsRequestHandler) and can manipulate all its properties (input/output) and can raise exceptions (while in a quite particular way as we’ll see below).

Here is a pseudo code showing how and when the filter’s callbacks are called:

  • Get the request
    • create GET/POST/SOAP request handler
    • pass request to serverIface
    • call plugins requestReady filters
    • if there is not a response
      • if SERVICE is WMS/WFS/WCS
        • create WMS/WFS/WCS server
          • call server’s executeRequest and possibily call sendResponse plugin filters when streaming output or store the byte stream output and content type in the request handler
      • call plugins responseComplete filters
    • call plugins sendResponse filters

    • request handler output the response

requestReady

This is called when the request is ready: incoming URL and data have been parsed and before entering the core services (WMS, WFS etc.) switch, this is the point where you can manipulate the input and perform actions like:

  • authentication/authorization
  • redirects
  • add/remove certain parameters (typenames for example)
  • raise exceptions

You could even substitute a core service completely by changing SERVICE parameter and hence bypassing the core service completely (not that this make much sense though).

Implementation details of server plugins will be discussed in depth in a future article, by now please refer to  QGIS HelloServer plugin for a complete implementation of the examples and methods cited in this article.


sendResponse

This is called whenever output is sent to FCGI stdout (and from there, to the client), this is normally done after core services have finished their process and after responseComplete hook was called, but in a few cases XML can become so huge that a streaming XML implementation was needed (WFS GetFeature is one of them), in this case, sendResponse is called multiple times before the response is complete (and before responseComplete is called). The obvious consequence is that sendResponse is normally called once but might be exceptionally called multiple times and in that case (and only in that case) it is also called before responseComplete.

SendResponse is the best place for direct manipulation of core service’s output and while responseComplete is typically also an option, sendResponse is the only viable option  in case of streaming services.

responseComplete

This is called once when core services (if hit) finish their process and the request is ready to be sent to the client. As discussed above, this is  normally called beforesendResponse except for streaming services (or other plugin filters) that might have called sendResponse earlier.

responseComplete is the ideal place to provide new services implementation (WPS or custom services) and to perform direct manipulation of the output coming from core services (for example to add a watermark upon a WMS image).

Raising exception from a plugin

Some work has still to be done on this topic: the current implementation can distinguish between handled and unhandled exceptions by setting a QgsRequestHandler property to an instance of QgsMapServiceException, this way the main C++ code can catch handled python exceptions and ignore unhandled exceptions (or better: log them).

This approach basically works but it does not satisfy my pythonic way of handle exceptions: I would rather prefer to raise exceptions from python code to see them bubbling up into C++ loop for being handled there.

Conclusions

The new plugin system is very flexible and allows for basic input/output (i.e. request/response) manipulation and for new services implementation while it remains unobtrusive and has negligible impact on performances, in the next article I will discuss server plugin implementation in depth.


See also the second part of this article.

See all QGIS Server related posts

ItOpen: QGIS and IPython: the definitive interactive console

$
0
0

Whatever is your level of Python knowledge, when you’ll discover the advantages and super-powers of IPython you will never run the default python console again, really: never!

If you’ve never heard about IPython, discover it on IPython official website, don’t get confused by its notebook, graphics and parallel computing capabilities, it also worth if only used as a substitute for the standard Python shell.

I discovered IPython more than 5 years ago and it literally changed my life: I use it also for debugging instead ofpdb, you can embed an IPython console in your code with:

from IPython import embed; embed()

TAB completion with full introspection

What I like the most in IPython is its TAB completion features, it’s not just like normal text matching while you type but it has full realtime introspection, you only see what you have access to, being it a method of an instance or a class or a property, a module, a submodule or whatever you might think of: it even works when you’re importing something or you are typing a path like in open('/home/.....

Its TAB completion is so powerful that you can even use shell commands from within the IPython interpreter!

Full documentation is just a question mark away

Just type “?” after a method of function to print its docstring or its signature in case of SIP bindings.

Lot of special functions

IPython special functions are available for history, paste, run, include and many more topics, they are prefixed with “%” and self-documented in the shell.

All that sounds great! But what has to do with QGIS?

I personally find the QGIS python console lacks some important features, expecially with the autocompletion (autosuggest). What’s the purpose of having autocompletion when most of the times you just get a traceback because the method the autocompleter proposed you is that of another class? My brain is too small and too old to keep the whole API docs in my mind, autocompletion is useful when it’s intelligent enough to tell between methods and properties of the instance/class on which you’re operating.

Another problem is that the API is very far from being “pythonic” (this isn’t anyone’s fault, it’s just how SIP works), here’s an example (suppose we want the SRID of the first layer):

core.QgsMapLayerRegistry.instance().mapLayers().value()[0].crs().authid()
# TAB completion stops working here^

TAB completion stop working at the first parenthesis :(

What if all those getter would be properties?

registry = core.QgsMapLayerRegistry.instance()
# With a couple of TABs without having to remember any method or function name!
registry.p_mapLayers.values()
[<qgis._core.QgsRasterLayer at 0x7f07dff8e2b0>,
 <qgis._core.QgsRasterLayer at 0x7f07dff8ef28>,
 <qgis._core.QgsVectorLayer at 0x7f07dff48c30>,
 <qgis._core.QgsVectorLayer at 0x7f07dff8e478>,
 <qgis._core.QgsVectorLayer at 0x7f07dff489d0>,
 <qgis._core.QgsVectorLayer at 0x7f07dff48770>]

layer = registry.p_mapLayers.values()[0]

layer.p_c ---> TAB!
layer.p_cacheImage            layer.p_children       layer.p_connect       
layer.p_capabilitiesString    layer.p_commitChanges  layer.p_crs           
layer.p_changeAttributeValue  layer.p_commitErrors   layer.p_customProperty

layer.p_crs.p_ ---> TAB!
layer.p_crs.p_authid               layer.p_crs.p_postgisSrid      
layer.p_crs.p_axisInverted         layer.p_crs.p_projectionAcronym
layer.p_crs.p_description          layer.p_crs.p_recentProjections
layer.p_crs.p_ellipsoidAcronym     layer.p_crs.p_srsid            
layer.p_crs.p_findMatchingProj     layer.p_crs.p_syncDb           
layer.p_crs.p_geographicCRSAuthId  layer.p_crs.p_toProj4          
layer.p_crs.p_geographicFlag       layer.p_crs.p_toWkt            
layer.p_crs.p_isValid              layer.p_crs.p_validationHint   
layer.p_crs.p_mapUnits    

layer.p_crs.p_authid
Out[]: u'EPSG:4326'

This works with a quick and dirty hack: propertize that adds a p_... property to all methods in a module or in a class that

  1. do return something
  2. do not take any argument (except self)

this leaves the original methods untouched (in case they were overloaded!) still allowing full introspection and TAB completion with a pythonic interface.

A few methods are still not working with propertize, so far singleton methods like instance() are not passing unit tests.

IPyConsole: a QGIS IPython plugin

If you’ve been reading up to this point you probably can’t wait to start using IPython inside your beloved QGIS (if that’s not the case, please keep reading the previous paragraphs carefully until your appetite is grown!).

An experimental plugin that brings the magic of IPython to QGIS is now available:
Download IPyConsole


Please start exploring QGIS objects and classes and give me some feedback!


IPyConsole QGIS plugin

Installation notes

You basically need only a working IPython installation, IPython is available for all major platforms and distributions, please refer to the official documentation.


ItOpen: QGIS developer meeting in Nødebo

$
0
0

During the hackfest I’ve been working on the refactoring of the server component, aimed to wrap the server into a class and create python bindings for the new classes. This work is now in the PR queue and brings a first working python test for the server itself.

The server can now be invoked directly from python, like in the example below:


#!/usr/bin/env python
"""
Super simple QgsServer.
"""

from qgis.server import *
from BaseHTTPServer import *

class handler (BaseHTTPRequestHandler):

    server = QgsServer()

    def _doHeaders(self, response):
        l = response.pop(0)
        while l:
            h = l.split(':')
            self.send_header(h[0], ':'.join(h[1:]))
            self.log_message( "send_header %s - %s" % (h[0], ':'.join(h[1:])))
            l = response.pop(0)
        self.end_headers()

    def do_HEAD(self):
        self.send_response(200)
        response = str(handler.server.handleRequestGetHeaders(self.path[2:])).split('\n')
        self._doHeaders(response)

    def do_GET(self):
        response = str(handler.server.handleRequest(self.path[2:])).split('\n')
        i = 0
        self.send_response(200)
        self._doHeaders(response)
        self.wfile.write(('\n'.join(response[i:])).strip())

    def do_OPTIONS(s):
        handler.do_GET(s)

httpd = HTTPServer( ('', 8000), handler)

while True:
    httpd.handle_request()

The python bindings capture the server output instead of printing it on FCGI stdout and allow to pass the request parameters QUERY_STRING directly to the request handler as a string, this makes writing python tests very easy.


Kartoza: Report back on the first QGIS User Conference in Nødebo, Denmark

$
0
0

I finally have some time to sit down and write up some thoughts on the QGIS User Conference and Developer Meeting (aka Hackfest) that we just held in Nødebo, Denmark. First up I need to thank Lene Fischer, who was the organiser and wowed us all with her relaxed and competent organisational approach to the conference. Thanks also to the University of Copenhagen School of Forestry – they sponsored the event by providing the venue and accommodation – and the venue was absolutely awesome with little cottages in the forest and all sorts of interesting diversions scattered around the forest. Lene gave me a list of names of people who helped to organise the event – I am sorry I have only got your first names but a very big thank you to you all!


Students: Runner, Shuttlebus, Kitchenaid, Cleaner, Info, Coordinator, Parking, Inn-keeper, Keyholder
Johanne
Thomas
Mikkel M
Steffen
Christian
Mikkel N
Ida
Louise
Anita
Thyge
Rune
Nanna
Peter
Jens
Heidi
Simon
Employees at University of CopenhagenCoordination, Accomodation, Bed&Linnen, Computer, Kitchen, Network, Tent/chairs/, Cookiebaker, Supporter, Cheerleader, Lifgt, Microphones/projector, Webpage, DTP,
Anne
Irene
Aleksander
Klaus
Vivian
Nicolas
Brian
Mike
Bo
Lene
Bent
Henning
Poul
Peter
MereteSusanne


On the first day of the user conference, I got to present a session on ‘the future of QGIS’ (video feed here and continued here) which held more as a town hall style meeting with a few themes (desktop, server, mobile etc.) I think the participants enjoyed the format and it was equally novel for the general user community (who got to have their questions answered directly by developers) and the developers (who got to see what real users look like).

The QGIS User Conference had many interesting talks (you can see the complete programme here– along with links to the video stream for each talk). For me the most interesting things happening at the meetup (both user conference and hackfest parts were:

  • the fact that we had our first ever general users conference (with around 150 attendees)
  • the geometry checking tools developed by Sandro Mani from Sourcepole
  • the huge amount of effort and thought being put into the processing framework – if you haven’t already tried out the QGIS processing tools, do go and try them!
  • The server side plugin framework that Alessandro Pasotti is working on – see his blog post here too http://www.itopen.it/qgis-developer-meeting-in-nodebo/
  • The amount of polish being applied to QGIS – there are probably less ‘gee whizz’ new features and a lot more fixes and improvements – just take a look at the incoming pull requests to get a flavour of the kind of activity going on.
  • The new geometry system by Marco Hugentobler (also from Sourcepole) which will support curves and 3D geometries (z / m). The graphical user interface for working with the new geometries won’t come until a later release, but 2.10 will get the underlying support added (along with shims to provide backwards compatibility to the old geometry classes).
  • There were some interesting talks on using QGIS in a server side / headless / command line context – again check out the talks and video streams in the programme to watch talks by Martin Dobias, Dražen Odobašić.
  • QGIS on mobile is coming – Matthias Kuhn showed off the current state of QField – the Android native interface for field work based on QGIS he has been working on. See his blog post here too for his take on the week. While the Android work shows lots of promise, there are still lots of problems to be resolved – for example missing support for ‘Lollipop’ devices. Please consider sponsoring Matthias’ efforts if you can.
  • There is a heap of interesting stuff coming down the pipeline from Nyall Dawson for the production of print maps and rendering effects for map renderers. Nyall also showed off some other very interesting ideas for context based variables that can be used in expressions – it’s hard to explain it in  a sentance or two – suffice to know that power users are going to have even more awesome tools at their fingertips for producing great maps.

One hot topic was ‘when will QGIS 3.0 be released’. The short answer to that question is that ‘we don’t know’ – Jürgen Fischer and Matthias Kuhn are still investigating our options and once they have had enough time to understand the implications of upgrading to Qt5, Python 3 etc. they will make some recommendations. I can tell you that we agreed to announce clearly and long in advance (e.g. 1 year) the roadmap to moving to QGIS 3.0 so that plugin builders and others who are using QGIS libraries for building third party apps will have enough time to be ready for the transition. At the moment it is still uncertain if there even is a pressing need to make the transition, so we are going to hang back and wait for Jürgen & Matthias’ feedback.

I apologise for not reporting on many of other interesting talks and birds of a feather meetings here – there was so much going on including work on documentation, translations, bug fixing, bug triaging that it is quite difficult to list it all here.

Two initiatives I was involved in at the meetup: the user certification programme and the formation of a QGIS legal entity. I am not going to post details here because things are not finalised yet (watch the mailing lists for details on the legal entity), but if you are interested in the certification programme, please get into contact – we have started drafting a roadmap for the roll out of our official curriculum. The QGIS project also got a huge boost from the QGIS Academy folks who will be contributing all their training resources right into the core of the QGIS documentation project (see Kurte Menke’s presentation notes on the programme).

We (Paolo Cavallini, Alessandre Pasotti, Nyall Dawson and myself) had a little roundtable discussion on the last day of the hackfest where we ran through some of the highlights from the week. You can listen to it here – or subscribe to the podcast at http://podcast.qgis.org (I will try to get back into the swing of making more regular episodes).

Well that wraps up my feedback for the event – I really encourage everyone to come along and join us on the next QGIS User Conference – it was fun, informal and informative!

anitagraser.com: QGIS 3.0 future plans

$
0
0

If you follow the QGIS developer mailing list, you’ve probably seen threads about the next major release: 3.0. The topic has been one of the many points we talked about at the latest QGIS developer meeting and Tim Sutton sums up the discussed plan in a post published today:

One hot topic was ‘when will QGIS 3.0 be released’. The short answer to that question is that ‘we don’t know’ – Jürgen Fischer and Matthias Kuhn are still investigating our options and once they have had enough time to understand the implications of upgrading to Qt5, Python 3 etc. they will make some recommendations. I can tell you that we agreed to announce clearly and long in advance (e.g. 1 year) the roadmap to moving to QGIS 3.0 so that plugin builders and others who are using QGIS libraries for building third party apps will have enough time to be ready for the transition. At the moment it is still uncertain if there even is a pressing need to make the transition, so we are going to hang back and wait for Jürgen & Matthias’ feedback.

The take-away message here is that the QGIS team is aware of the current developments around Python and Qt and will keep the community updated about the further development path well before any move.

qgis_keep_calm


ANDROID · GIS · WEB: QGIS Quality and Testing

$
0
0
I promised that I will write a bit about what I’ve been up to at the last QGIS developer meeting – apart from the social part we also got some work done there. So let me start with something that
See more ›

Lutra Consulting: How to Use Function Editor in QGIS Field Calculator

$
0
0

In QGIS 2.8, there is a new option for users to add their own python function in the Field calculator. This is an extremely useful feature enabling users to populate data within the attribute table using customised python function.

Nathan wrote a blog post about the feature and how to write a python with arguments. But in QGIS 2.8, the function editor does not correctly support functions without arguments.

In the example below, we are going to calculate proportion of area for each SAC (Special Areas of Conservation) in Great Britain to the total area of the layer.

Add GB_SAC_20130918_Dissolved.shp layer to QGIS, right-click on the layer and open attribute table. Make the layer editable and click on the Field calculator. We are now going to create a new column (propArea) and populate proportionate area of each SAC to the total area of the layer.

Under Function Editor tab, click on New file and type area for the name and save the file. For the content, copy and paste the following lines:

"""
A custom function to calculate total area of the GIS layer.
This function has no arguments.
"""

from qgis.core import *
from qgis.gui import *
from qgis.utils import iface

@qgsfunction(args='auto', group='Custom')
def total_area(x, feature, parent):
    return sum( f.geometry().area() for f in iface.activeLayer().getFeatures() )

Click on Run Script to add total_area function to your Custom function list.

Now, click on Expression tab and type:

$area / total_area(0)

As you can see, we have passed 0 as an argument. If you click OK, your QGIS will freeze! As there are many features in the layer, the expression, calculates total area for each row.

Lets make the script a bit more elegant. Firstly, we need to add caching, so that area will be calculated only once and cached for the rest of operation. Secondly, we can make the script a bit more generic, so that we can use it to get the area of other loaded layers in QGIS:

from qgis.core import *
from qgis.gui import *
from qgis.utils import iface

cache = {}
def _layer_area(layer):
    """ Internal method """
    if layer.name() not in cache:
        area = sum( f.geometry().area() for f in layer.getFeatures() )
        cache[layer.name()] = area
    return cache[layer.name()]

@qgsfunction(args='auto', group='Custom')
def total_area(layer_name, feature, parent):
    for layer in iface.mapCanvas().layers():
        if layer.name() == layer_name:
            return _layer_area(layer)
    return 0

Now, click on Expression tab and type:

$area / total_area('GB_SAC_20130918_Dissolved')

This time, it should be quicker!

QGIS.dk articles: The man with the golden gun ( and some examples of installing and using QGIS on Windows)

$
0
0

I’m not Scaramanga (maybe a little bit of Nick Nack) but anyway, this article could be be a golden bullet for helping you to eliminate a lot of obstacles if you are using QGIS in some kind of class-room setup, networked environment and/or are struggling with the “new versions 3 times a year” policy of QGIS.

man-with-the-golden-gun-008

My interest for a hassle free and fast installation of QGIS stems from an experience last year: Some colleagues and I was giving a QGIS workshop for attendants from all over the world. We were told that QGIS was installed on all the computers in the “out-of-town” computer lab and indeed, the computers we checked had a working installation of QGIS. Next day, 15 minutes before the workshop should start, we discovered that the QGIS installations was either non-existent or badly mangled on a large portion of the rest of the computers. And no person with “local admin” rights within sight. It would be an understatement to say that the first hour of the workshop was an interesting time for us. Well, all’s well that ends well, and in the end the workshop was a success (Lucky us!)

A couple of months later I stumbled on this article “A QGIS class room setup on Windows” – thanks to Richard Duivenvoorde – and tried the setup by copying the qgis program directory from the initial install to another “clean” computer. Alas, QGIS did work on some – but not on all of the computers, I tried it on. The QGIS installation had some dependencies to dll’s in the windows/system32 directory. If they already were present, the “copy” installation would work but otherwise it would fail. I discovered a somewhat complicated solution to the problem and publicized it in the article “How to make a ‘QGIS on a stick’ implementation

Then, some weeks ago at the “QGIS 2015 conference at Nødebo“, I had a chat with QGIS core developer Jürgen E. Fischer about my installation problems and viola! Two days after the chat, the OSGEO4W network installation contained the missing dll’s, Thanks Jürgen.

So now we have two bits of information:

  • By using the “–configpath” qualifier we can redirect where QGIS is looking for plugins, user selected values for options, values and files normally saved in the .qgis2 directory or in the registry.
  • The OSGeo4W network installation creates QGIS without any dependencies to external dll’s outside the installation directory. You could make an installation by simply copy an existing QGIS program directory to another computer.

This gives us some interesting possibilities:

  • Use case I : “QGIS on a stick”
    You can make a QGIS installation located on a memory stick and completely self contained; simply plug in the stick into a Windows computer and start QGIS by double clicking on the QGIS startup file.
  • Use case II: “Simple ‘xcopy’ installation of QGIS”
    Make an installation procedure for QGIS that consists of a simple copy of the QGIS program directory to a new computer. Like the answer to: “How the heck am I going to install QGIS on 24 computers in half an hour ?”
  • Use case III: “Network install of QGIS with floating profiles”
    Install QGIS on a network file share and put the QGIS setup information into the “Floating profile”. A large part of a user profile including will be cached on a central server in the windows domain. If the user logs on to another computer than the usual, his/her profile will automatically be copied to the new computer, giving the user his “normal” desktop and setups.
  • Use case IV: “QGIS on Citrix”
    Normally it ain’t my cup of tea to install any kind of program on a Citrix server where the program has a “canvas” area with fast changing images/pixels. For example: A GIS program like QGIS showing a map with an orthofoto background with millions of pixels – all with a slightly different hues of greens or browns.
    However, many IT departments swears by Citrix, so….
  • Use Case V: “Smart installation and update of a large amount of QGIS installations”
    If you have to install QGIS on dozens or hundreds of computers and keep the installation up-to-date, this is the use-case for you.

Step 1: Creating the common template..

First you have to create a common template for your future installation(s) whatever use case you implement afterwards. I use the 32-bit edition of the network installation as a basis for this although it’s perfectly possible to use the 64 bit version.

  1. Browse to http://qgis.org/en/site/forusers/download.html and click on OSGeo4W Network installer (32 bit) . This will download the installer.
  2. Start the installer and choose “Express Desktop Install”.
  3. Check “QGIS” and uncheck everything else.
  4. Check “I agree yadda yadda…” to every license message.This will install a default QGIS installation in directory C:\OSGeo4W and create a QGIS user directory in C:\Users\<my username>\.qgis2, i.e. the directory .qgis2 in your home directory. These 2 directories is the basis for the template. You can check the installation by starting QGIS from the “OSGeo4W” program group in “Start” –> “All Programs”. It should work without problems.
  5. Copy the C:\Users\<my username>\.qgis2 directory with contents to C:\OSGeo4W, so you’ll have a C:\OSGeo4W\.qgis2 directory.
  6. Copy the startup file for QGIS: C:\OSGeo4W\bin\QGIS.bat to C:\OSGeo4W\bin\QGIS.ref. This is insurance ! If you utterly mangle QGIS.bat in the next steps you have this file as a backup. Otherwise you are not going to use it for anything.
  7. Edit the file: C:\OSGeo4W\bin\QGIS.bat with a simple text editor like notepad.
    Insert 2 lines between line 2 and 3 in the bat file:
    call “%~dp0\o4w_env.bat”
    call “%OSGEO4W_ROOT%”\apps\grass\grass-6.4.4\etc\env.bat

    so it looks like this:

    call “%~dp0\o4w_env.bat”
    set QGIS_OAS=”%OSGEO4W_ROOT%”\.qgis2
    if exist “%OSGEO4W_ROOT%”\bin\QGIS_OAS.bat call “%OSGEO4W_ROOT%”\bin\QGIS_OAS.bat
    call “%OSGEO4W_ROOT%”\apps\grass\grass-6.4.4\etc\env.bat

    and replace the last line in the bat file:

    start “QGIS” /B “%OSGEO4W_ROOT%”\bin\qgis-bin.exe %*

    with this line:

    start “QGIS” /B “%OSGEO4W_ROOT%”\bin\qgis-bin.exe –configpath %QGIS_OAS% %*

    and save the result.

    What the edits mean:

    • Create an environment variable %QGIS_OAS% which works as a pointer to the location of the .qgis2 directory. Initially it points to the .qgis2 directory inside the OSGeo4W installation directory we created in (5).
    • Execute a command-file “QGIS_OAS.bat” if it exists. This command-file is the basis for all our different use-cases. There will be a different version for each use-case. Initially we don’t use this file.
    • Add the “–configpath %QGIS_OAS% qualifier to the actual start of QGIS. This means, that QGIS will look for all setup information, user-defined options, plugins and whatnot in the directory specified by the %QGIS_OAS% environment variable. And QGIS will not use any settings in the registry.
  8. Start QGIS by double clicking the revised C:\OSGeo4W\bin\QGIS.bat file and make all the changes to the initial setup of QGIS that should be included in your future QGIS installation(s). This could be change of language, default projection, extra plugins, snap options, yadda yadda yadda. Come on, make you dream QGIS setup !!

Thanks to the –configpath qualifier now on the start line for QGIS all these changes will be saved in the C:\OSGeo4W\.qgis2 directory. After this, you have a complete setup of QGIS – with your own changes – all located in the C:\OSGeo4W directory. This is the common template for all use cases.

Step 2: Do one of the use cases…

Use case I : “QGIS on a stick “

You have already done this use case. The template made in step 1 is a ready made “QGIS on a stick” installation:

  1. Copy the entire C:\OSGeo4W template directory from your computer to the root of your memory stick.
  2. Insert the memory stick into any Windows computer and start QGIS by double clicking on \OSGeo4W\bin\qgis.bat on the memory stick.
    QGIS will use \OSGeo4W\.qgis2 on the memory stick as the QGIS user directory.

Use case II : “Simple ‘xcopy’ installation of QGIS “

In this use case we will have to extend the template by creating the QGIS_OAS.batfile. This example will put the QGIS user directory “.qgis2” in the users home directory, just like the normal installation does – with one exception: This installation will not use the registry but save all user options in a ini-file placed in the QGIS user directory.

  1. Create the file C:\OSGeo4W\bin\QGIS_OAS.bat with the following content:
    set QGIS_OAS=”%USERPROFILE%”\.qgis2
    if exist %QGIS_OAS% exit /B
    xcopy “%OSGEO4W_ROOT%”\.qgis2 %QGIS_OAS% /e /i
    nircmd shortcut “””%OSGEO4W_ROOT%””\bin\qgis.bat” “~$folder.desktop$” “Start QGIS” “” “””%OSGEO4W_ROOT%””\bin\qgis-bin.exe” “0” “min” “””%OSGEO4W_ROOT%””\bin” “”

    (First the pointer to the QGIS user directory is changed to the “users home directory”\.qgis2. Secondly, The command file will check if the QGIS user directory exists in the users home directory. If it doesn’t exist, the command file will create a copy of the QGIS user directory template into the users home directory; create a shortcut to start QGIS and place this shortcut on the user’s desktop.)

  2. You can now install QGIS on a new PC by copying the entire C:\OSGeo4W directory to the new pc (using a memory-bird, network drive, zip-copy-unzip, whatever). The directory can be copied to any directory location on the new PC. Please note that some locations will require “local admin” rights for creating the new directory, for example if you copy it to “C:\Program Files”. I usually try the avoid this.

First time use on the new pc:

  • Start QGIS by double clicking on C:\OSGeo4W\bin\qgis.bat (or wherever you placed the OSGeo4W directory). When QGIS starts, the combined command files QGIS.BAT and QGIS_OAS.BAT will automatically create the QGIS user directory on the new pc; create a shortcut to QGIS on the user desktop and start QGIS.

After that you can start QGIS by double clicking on the shortcut placed on the desktop.


Use case III: “Network install of QGIS with floating profiles

This usage scenario will have the QGIS installation located in a directory on a common network file-share. A normal user need only to have read and execute rights to this directory. The QGIS user directory will be placed in the users “roaming profile” on the client PC, a special region which is cached to a central server.

The computers and users are members of a AD domain. If the user logs on to another pc in the domain, the “roaming profile”, including the desktop and the QGIS user directory, will automatically be copied the new computer and the user will see the usual desktop and applications.

With this setup, there is no dependencies to any particular client pc after the first start of QGIS by the user. If the user logs on any other client PC in the domain it will be possible for her to start QGIS simply by double clicking on the QGIS shortcut on desktop.

There is some requirements: The user has to have access to the common file share (!) and the network connection has to be stable and relatively fast.

In this use case we will do the following:

  1. Copy the QGIS directory C:\OSGeo4W to the common share: X:\QGIS\Current (The drive letter X: is arbitrary; it could be any drive letter). I will explain the naming scheme of the directory later.
  2. Create the file X:\QGIS\Current\bin\QGIS_OAS.bat with the following content
    set QGIS_OAS=”%APPDATA%”\.qgis2
    if exist %QGIS_OAS% exit /B
    xcopy “%OSGEO4W_ROOT%”\.qgis2 %QGIS_OAS% /e /i
    nircmd shortcut “””%OSGEO4W_ROOT%””\bin\qgis.bat” “~$folder.desktop$” “Start QGIS” “” “””%OSGEO4W_ROOT%””\bin\qgis-bin.exe” “0” “min” “””%OSGEO4W_ROOT%””\bin” “”

    (First, The QGIS_OAS environment variable points to the qgis user directory in the roaming profile. Secondly, the command file will check if the QGIS user directory exists. If it doesn’t, the command file will copy the QGIS user directory template to the users roaming profile; create a shortcut to start QGIS and place this shortcut on the user desktop.)

First time use on the new pc:

  • Start QGIS by double clicking on X:\QGIS\Current\bin\qgis.bat. When QGIS starts, the combined command files QGIS.BAT and QGIS_OAS.bat will automatically create the QGIS user directory on the new pc, create a shortcut on the user desktop and start QGIS.
  • After the first time you start QGIS by double clicking on the shortcut placed on the desktop.

Oh .. and why did I use this particular naming scheme for the directory ? It is used to make it easy to update QGIS:

When you have a new version of QGIS, do the following:

  1. Make a template of the new qgis version as described in step 1 and use case III, but in another directory: X:\QGIS\Testing and leave the X:\QGIS\Current unchanged.
  2. Test the new installation. You might even let some of your users test it!! You can start the “testing” version of QGIS by double clicking on X:\QGIS\Testing\bin\qgis.bat
  3. When you are satisfied with the new installation:
    • Rename the directory X:\QGIS\Current to X:\QGIS\Deprecated
    • Rename the directory X:\QGIS\Testing to X:\QGIS\Current 

After the last rename operation all the networked users will execute the new version using their existing shortcut. This method will probably work with all minor updates (2.8 -> 2.10), but probably not with a major update (2.10 -> 3.0)

Use case IV : “QGIS on Citrix “

If you have a Citrix environment you probably have a personal network-based share for each an every user on the domain. For this use case I call this directory M:\Personal. But the naming convention can be anything.

The idea is to place the QGIS user directory on the personal network share, so there won’t be anything saved or registered on the Citrix server that’s user related:

Do the following:

  1. Create a working installation of QGIS on the Citrix sever using the techniques described in Step 1.
  2. Create the file C:\OSGeo4W\bin\QGIS_OAS.bat on the Citrix server with the following content:
    set QGIS_OAS=M:\Personal\.qgis2
    if exist %QGIS_OAS% exit /B
    xcopy “%OSGEO4W_ROOT%”\.qgis2 %QGIS_OAS% /e /i

    (First, The QGIS_OAS environment variable points to the qgis user directory placed on the users personal network share. In this case “M:\Personal”. Secondly, the command file will check if the QGIS user directory exists. If it doesn’t, the command file will copy the QGIS user directory template to the users personal network share.)

  3. Create the usual application startup definition for Citrix pointing to C:\OSGeo4W\bin\QGIS.bat on the Citrix server.

Bingo ! That’s it. I’ll leave the last use case “Smart installation and update of a large amount of QGIS installations” to a separate article, because it is more complicated than any of the previous use cases. I’ll try to publish that article in a week or so, so stay tuned !!

This article has a zip file “QgisOnAStick.zip” attached. It contains the revised QGIS.BAT file plus all the different types of QGIS_OAS bat files described in the article. The suffix is renamed to “.usecase_1″, “.usecase_2″ and so on. Download the zip file and rename the suffix to “.bat” on the files you’re going to use.

A final note: I’ve used QGIS 2.8.2 in my tests. So the use cases works for this version of QGIS and will probably work for other QGIS 2.x versions.

Regardsbo

Bo Victor Thomsen

bvt@aestas.dk
AestasGIS
Denmark

ItOpen: QGIS Quick WKT plugin iface edition

$
0
0

Some plugin core functions can now be called from a Python console:

g = QgsGeometry.fromWkt('POINT (9.9 43)')
iface.show_geometry(g)
iface.show_geometry(g.buffer(0.2, 2))
iface.show_wkt('POINT (9 45)')
iface.show_wkb(r'0103...') # cut

All functions accept a layer title as optional argument, if None is given, they are automatically added to a Quick WKT GeometryType (memory) layer, such as Quick WKT Polygon for polygons.

Lutra Consulting: Crayfish 2.1: New Features

$
0
0

New features keep being added to Crayfish. Now it is possible to export time variable grid as animation, add AnuGA results and visualise vectors on user-defined grids.

Here are the new features in more detail…

Export to animation

The ground works were done in Crayfish 2.0 for this feature. You can now generate animation from contours and vectors and export them as AVI. There are two methods of exporting to animation: basic and using QGIS print template (qpt).

With the basic option, you can define a title, a legend and a progress clock. Alternatively, for a smarter solution, you can set up a print composer with the benefit of all its rich features. The composer template (qpt) can be used as a frame layout for exporting your animation.

Below is an example of a multi-frame print composer template used to generate animation from a Crayfish layer.

AnuGA support

Crayfish 2.1 now supports SWW file format generated by AnuGA.

SWW files generated by AnuGA in Crayfish (Click to enlarge)

Vector on user-defined grid

With this option, users can define a grid and Crayfish will interpolate values and displays results on the custom grid. Images below show vectors on the outputted mesh and user-defined grid.

Vectors on default mesh in Crayfish (Click to enlarge)

Vectors on default mesh in Crayfish (Click to enlarge)

Vectors on a user-defined mesh in Crayfish (Click to enlarge)

Crayfish manual

With the ever-growing features in Crayfish, we have decided to dedicate a page on how to use Crayfish in QGIS. From the manual page, users can download a sample data and try the Crayfish features in QGIS.

Sponsors

We’d like to thank Maroondah City Council for sponsoring some of the great features in this release.


QGIS NL Community: Change predefined scales plus new PDOK services

$
0
0
New PDOK services This post is mostly interesting for dutch readers, as our national OWS service ‘PDOK’ added some new services. And we made them (5000 layers) available via the PDOK services plugin. Change predefined scales But I also want to show that you can change the predfined scales that you see in the Scale […]

ANDROID · GIS · WEB: QField in the wild

$
0
0
QField Experimental is out, after a couple of months of requirements gathering, private early alpha testing and foremost tons of emails requesting access to the testes group we decided today to put the current BETA version in the playstore. This means that from now on you can install QField just like any other android app by using the playstore.
QField app on Google Play
See more ›

anitagraser.com: QGIS 2.10 symbology feature preview

$
0
0

With the release of 2.10 right around the corner, it’s time to have a look at the new features this version of QGIS will bring. One area which has received a lot of development attention is layer styling. In particular, I want to point out the following new features:

1. Graduated symbol size

The graduated renderer has been expanded. Formerly, only color-graduated symbols could be created automatically. Now, it is possible to choose between color and size-graduated styles:

Screenshot 2015-06-21 18.39.25

2. Symbol size assistant

On a similar note, I’m sure you’ll enjoy the size assistant for data-defined size:

Screenshot 2015-06-21 23.16.10Screenshot 2015-06-21 23.16.01

What’s particularly great about this feature is that it also creates a proper legend for the data-defined sizes:

Screenshot 2015-06-21 23.18.46

3. Interactive class exploration and definition

Another great addition to the graduated renderer dialog is the histogram tab which visualizes the distribution of values as well as the defined class borders. Additionally, the user can interactively change the classes by moving the class borders:

Screenshot 2015-06-21 18.43.09

4. Live layer effects

Since Nyall’s crowd funding initiative for live layer effects was a resounding success, it is now possible to create amazing effects for your vector styles such as shadows, glow, and blur effects:

Screenshot 2015-06-21 18.45.22

I’m very much looking forward to seeing all the new map designs this enables on the QGIS map Flickr group.

Thanks to everyone who was involved in developing and funding these new features!


Marcus SOC reports: Second report

$
0
0

What do I have completed this week?

  • A new implementation was designed to take into account several algorithms running. (using bounded signals)

  • Deep analysis of the processing in order to fit this new design into the current implementation of the Processing toolbox

  • Thread/Signal debugging

  • Fix the problem that makes QGIS crash when starting the new thread


What am I going to achieve for the next week?

Continue working on the new design of the multithreading support.

Is there any blocking issue?

There is no blocking issue for now.


Marcus SOC reports: First report

$
0
0

What do I have completed this week?

  • New implementation of the AlgorithmExecutor subclassing QObject.
  • Mechanism to deal with crashing Algorithms: when there is an exception during the algorithm execution, a signal is emitted in order to allow the main thread to make the other thread quit.
  • Use signal to connect the algorithm progress signal to the setPercentage slot in the ProgressBar


In the runAlgorithm method of the Processing class I changed the code associated with the runalg in order to support multithreading. Each time that an algorithm is running through the QGIS python console, a new thread and a new instance of the algorithm executor are created. The signals of the AlgorithmExecutor are connected to the thread signal in order to quit the thread and run the algorithm when the thread starts. While the algorithm is running, the main thread waits for the algorithm to finish and then proceed to show the output (first approach)


What am I going to achieve for the next week?

Create a non-blocking version of the processing in order to the interface not wait for the algorithm to finish.

Is there any blocking issue?

QGIS seems to crash randomly when starting the new thread and, when it doesn’t crash, the output of the algorithm is None, which may indicate that the algorithm is crashing in the new thread.


The complete report about the crashing can be found here.


Viewing all 1090 articles
Browse latest View live